These are the things you will need. Cotton, patterns, edible glue,
rolling pin, spatula, thin paint brush, craft knife, veiner & gum paste.

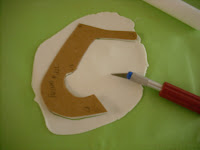
Roll out your gum paste aprox 8/16" (thick as a pita bread).
This piece is the sole (bottom) of shoe. Use the same pattern
just flip it over to cut out the left foot.
*Note:You don't have to let it dry before applying the upper part of the shoe. I find it easier to do it as soon as I cut it out.

Roll this part of gum paste 4/16" (thick as a flour tortilla.)
After cutting smooth any rough edges with your fingertips.

Using a small brush and some edible glue (Tylose & water)
brush around the edge of the sole all around. Be careful not to get the bottom or it will stick to your mat.

Wrap the upper part of the shoe around the front first before
doing the sides and back. Add a little glue to the side of the shoe
to close the seam. Using your the veiner tool, gently push the upper part under the shoe to smooth it out.
I wish I could've been able to post more pictures on this tutorial but I was only allowed 5 pictures, so I chose these ones. I felt that these were a little more self explainable. Hope you find it helpful and it works out for you. You can always ask me any questions, I will answer any of them you have.


0 comments on "Baby shoe tutorial"
Post a Comment